
How To Monetize Your App With Google Admob (part 3)
 198
198  0
0  33
33

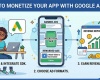
How to Monetize Your App with Google AdMob: The Complete Beginner's Guide (Part 3)
You've done the hard work. You built a genuinely useful app, tested it through closed testing until it was bug-free, and optimized your Play Store listing so the right users can actually find it. Downloads are coming in. People are opening your app regularly.
Now the question everyone actually wants answered: how does that usage translate into real money in your bank account?
This is Part 3 of our App Income series the monetization chapter. In Part 1, we covered building and properly launching a simple utility app. In Part 2, we went deep on App Store Optimization (ASO) and how to rank in Play Store search results. Now we're getting into the mechanics and strategy of turning your app into a reliable passive income stream.
The answer for most utility apps starts with one platform: Google AdMob.
What Is Google AdMob And Why Does It Dominate Mobile Advertising?
If you've ever run a website with Google AdSense, you already understand the basic concept. AdMob is AdSense for mobile apps.
Here's the simple version of how it works:
Millions of companies from Fortune 500 corporations to small e-commerce stores pay Google to advertise their products and services. Google needs places to show those ads. Your app becomes one of those places. Every time a user sees or interacts with an ad inside your app, Google collects money from the advertiser and gives you a cut.
You don't find advertisers. You don't negotiate rates. You don't invoice anyone. You integrate a small piece of code into your app, connect it to your AdMob account, and Google handles the entire advertising ecosystem automatically matching the most relevant and highest-paying ads to your specific user base.
Why AdMob Specifically?
There are other mobile ad networks Meta Audience Network, AppLovin, Unity Ads, IronSource and for more advanced developers, running multiple networks simultaneously (called "mediation") can increase revenue. But for beginners, AdMob is the right starting point for several reasons:
Scale: Google's advertising network is the largest in the world. More advertisers competing for your ad slots means higher prices paid per impression.
Trust and reliability: AdMob has been around since 2006 and was acquired by Google in 2009. Payments are reliable, the dashboard is well-documented, and support resources are extensive.
Integration simplicity: AdMob's SDK (the code you add to your app) is well-maintained, widely supported across development platforms including no-code tools, and extensively documented with tutorials for beginners.
Unified account: Your AdMob account connects directly to Google AdSense, meaning all your digital income website ads and app ads can flow into the same Google account and payment method.
Understanding How AdMob Actually Pays You
Before diving into ad formats, it helps to understand the revenue mechanics so you can set realistic expectations and make smarter decisions about your monetization strategy.
Key Metrics You Need to Know
Impressions: Every time an ad is displayed to a user, that counts as one impression. Your total daily impressions = daily active users average number of ads seen per session.
eCPM (Effective Cost Per Mille): This is your earnings per 1,000 ad impressions. It's the single most important number in app monetization. An eCPM of $2.00 means you earn $2 for every 1,000 times an ad is shown in your app.
DAU (Daily Active Users): The number of unique users who open your app on a given day. This is your core growth metric.
Fill Rate: The percentage of ad requests that actually result in an ad being shown. A 95% fill rate means 95% of the time your app asks AdMob for an ad, one is available to display.
Realistic Revenue Estimates
eCPM varies based on several factors: the geographic location of your users (US, UK, Canada, and Australia command the highest rates), your app category (finance and business apps earn more than entertainment), the ad format (rewarded video pays more than banner), and the time of year (Q4 is always the highest due to holiday advertising spend).
Here are realistic eCPM ranges to plan around:
Ad FormatLow End eCPMMid Range eCPMHigh End eCPMBanner Ads$0.20$0.80$2.00Interstitial Ads$1.50$4.00$12.00Rewarded Video$3.00$8.00$20.00+
And what that looks like in practice for a utility app with 5,000 daily active users:
- Banner ads only: 5,000 users 5 impressions each = 25,000 impressions $0.80 eCPM = $20/day ~$600/month
- Interstitials (1 per session): 5,000 impressions $4.00 eCPM = $20/day ~$600/month
- Mixed strategy (banners + interstitials): realistically $30$50/day $900$1,500/month
These aren't fantasy numbers. They're conservative mid-range estimates for a modestly successful utility app with a decent user base. And unlike a freelance project that ends when the work is delivered, this revenue continues as long as users keep opening the app.
The Three Ad Formats: When and How to Use Each One
Choosing the right ad format isn't just about maximizing revenue it's about maximizing revenue without destroying the user experience that generates the revenue in the first place. These two goals are more connected than most beginners realize.
Banner Ads: Steady Background Revenue
Banner ads are rectangular ads that sit permanently at the bottom (or occasionally top) of your app's screen while the user interacts with other content. They're the least intrusive format and generate the lowest eCPM but they're always on.
When to use them: Banner ads work best in apps where users spend extended time on a single screen. A packing list app where someone is scrolling and editing their list for 10 minutes is a good candidate. A timer app where the user sets a timer and waits is another.
When they underperform: If your app is primarily used in quick, 30-second bursts (open, get the answer, close), banners won't accumulate enough impressions to be meaningful. You'd be better served by interstitials triggered on exit.
Implementation tip: Place banners at the bottom of the screen, not the top. Users are less bothered by ads below their content than above it. Also ensure the banner doesn't overlap with interactive elements like buttons or input fields accidental clicks frustrate users and can violate AdMob's policies.
Interstitial Ads: Your Highest-Volume Revenue Driver
Interstitial ads are full-screen ads that appear at natural transition points in your app between screens, after completing an action, or when moving from one section to another. Because they command the full screen and a user's complete attention, advertisers pay significantly more for them.
When to use them: The key word in "natural transition points" is natural. The best interstitial placements feel like a brief pause between chapters, not an interruption mid-sentence.
Good placement examples:
- After a user saves a completed checklist and returns to the home screen
- After a calculation result is displayed and the user taps "Calculate Again"
- When a user finishes one task and navigates to start a new one
- On app close or when a user presses the back button to exit
Frequency capping: AdMob allows you to set a minimum time between interstitials. For most utility apps, one interstitial per 35 minutes of usage or per significant completed action is the right balance. Showing interstitials every 60 seconds will get your app uninstalled.
The critical rule: Never show an interstitial when a user is actively inputting data, reading important content, or in the middle of a task. Interrupting someone who is typing "passport" into their travel checklist with a full-screen ad is the fastest path to a 1-star review.
Rewarded Video Ads: The Highest eCPM Option
Rewarded video ads give users something valuable in exchange for voluntarily watching a short video ad (typically 1530 seconds). Because users opt in, completion rates are extremely high and advertisers pay a significant premium for that guaranteed full-view attention.
In games: This format is everywhere. "Watch a video to earn an extra life / continue your game / get 100 coins."
In utility apps: You need to think more creatively, but it absolutely works. Examples:
- Packing list app: "Watch a short video to unlock our Pre-Built Templates (Camping Trip, Beach Vacation, Business Travel)"
- Calculator app: "Watch to unlock full history of your last 50 calculations"
- Habit tracker: "Watch to unlock custom icons and color themes"
- Budget app: "Watch to export your data as a PDF or spreadsheet"
The value exchange needs to feel genuinely worth 30 seconds of the user's time. If you offer something trivial, users won't engage. If you offer something they actually want, rewarded ads can become a consistent revenue source while simultaneously making users feel good about the interaction which is the opposite of how most ads make people feel.
Designing Your Monetization Strategy: The Framework
Here's a practical framework for deciding which ad combination to use based on your app type:
For Apps With Long Session Times (5+ minutes per session)
Users who spend significant time in your app are your most valuable users from an advertising perspective. Use:
- Banners running continuously during the session
- Interstitials at natural transition points (limit to 23 per session)
- Rewarded ads as an optional premium unlock
For Apps With Short, Frequent Sessions (under 2 minutes, used multiple times daily)
Quick-use apps (calculators, converters, reference tools) are opened, used briefly, and closed. Banners barely have time to accumulate impressions. Use:
- Interstitials triggered on exit or after completing the core action
- Rewarded ads for unlocking features users actually want
For Apps With Irregular Usage Patterns
Some apps are opened intensively for a few days (planning a trip) then dormant for weeks. For these:
- Interstitials during the active planning period
- Rewarded ads for high-value unlocks that encourage return visits
Setting Up AdMob: The Technical Path
Once you've decided on your ad strategy, here's how the actual setup works:
Step 1: Create an AdMob account at admob.google.com using your Google account. You'll need to provide payment information and verify your identity before earnings can be paid out.
Step 2: Add your app to AdMob. In the AdMob dashboard, you'll register your app (either by linking it directly from the Play Store if it's already live, or by manually adding it with your app's package name).
Step 3: Create Ad Units. For each type of ad you want to show, you create a separate "Ad Unit" in AdMob. Each Ad Unit has a unique ID that you'll reference in your app's code. Create one for banners, one for interstitials, one for rewarded whatever formats you're using.
Step 4: Integrate the AdMob SDK. This is where the technical work happens. If you're using Android Studio with Java or Kotlin, Google's official documentation walks through the integration step by step. If you're using a no-code platform like MIT App Inventor or FlutterFlow, AdMob integration is built into the platform through extensions or built-in components no raw code required.
Step 5: Test with test ads. AdMob provides test ad unit IDs specifically for development. Always use test ads during development and testing clicking your own real ads violates AdMob's policies and can get your account suspended.
Step 6: Go live and monitor. Once your app is published, switch to your real Ad Unit IDs and monitor your dashboard. AdMob shows impressions, clicks, estimated earnings, and eCPM broken down by ad format and date. Use this data to optimize if interstitials are dramatically outperforming banners, lean into them more.
AdMob Policies: The Rules You Cannot Break
AdMob's policies exist to protect advertisers from fraud and ensure ad quality. Violating them can result in your account being permanently suspended which means losing all monetization. These are non-negotiable:
Never click your own ads. Ever. Don't ask friends or family to click ads either. AdMob's fraud detection is sophisticated and account suspension follows quickly.
Never incentivize ad clicks. Saying "tap the ad to support us" or placing ads next to buttons in a way that causes accidental clicks is a policy violation.
No ads in apps designed for children (under 13). If your app is categorized for children on the Play Store, you must use AdMob's child-directed settings which severely restrict ad types.
Ads must be clearly distinguishable from app content. Users must always be able to tell what is an ad and what is your app.
No misleading ad placement. Placing ads in locations designed to generate accidental clicks (next to UI elements, at the edge of the screen) is a violation even if unintentional.
Reading through AdMob's full policy documentation before going live is genuinely worth an hour of your time. One suspension can undo months of work.
What To Expect in Your First 90 Days
Realistic expectations prevent early discouragement, which is the most common reason new developers give up before their app gains traction.
Days 130: Your app has limited users. Revenue will be low possibly just a few dollars per day or less. This is normal. Focus on monitoring crash reports, responding to early reviews, and refining the user experience.
Days 3060: If your ASO is working, organic downloads should be increasing. You'll start to see clearer patterns in your AdMob data which ad formats perform best, which screens generate the most impressions, what your average session length looks like.
Days 6090: With a growing user base and refined ad placement, revenue should be trending upward. This is also the time to consider whether a freemium tier (removing ads for a one-time payment) makes sense for your audience.
The apps that generate significant long-term passive income are almost never overnight successes. They're the result of consistent refinement over months improving the app, improving the store listing, improving the ad strategy until the flywheel starts spinning on its own.
The Bigger Picture: Building a Portfolio
One successful utility app is a nice income stream. A portfolio of five to ten well-maintained utility apps can become a genuinely substantial passive income business.
The skills you develop building and monetizing your first app ASO, AdMob integration, user experience design, crash analysis transfer directly to every subsequent app. Your second app takes less time to build than your first. Your third takes less than your second. Over time, you accumulate a collection of small digital assets each generating modest but consistent revenue.
Many solo developers generating $5,000$15,000 per month from apps aren't doing it with one massive app. They're doing it with ten or fifteen small utility apps each generating $500$1,500 per month individually.
Your Complete Blueprint The Three-Part Summary
You now have the full picture across all three parts of this series:
Part 1 Build and Launch: Identify a micro-utility problem, build a clean and simple solution, test it thoroughly through closed testing, and publish a polished product to the Play Store.
Part 2 Get Found: Optimize your app title, description, keywords, screenshots, and icon using ASO principles so the right users find your app organically through Play Store search.
Part 3 Monetize: Implement AdMob with the right ad formats for your app type, place ads at natural transition points that respect the user experience, monitor your metrics, and iterate.
None of this happens overnight. But each step is learnable, each cost is minimal, and the income once established is genuinely passive.
Are you currently working on an app, or do you have an idea waiting to be built? Drop it in the comments. If you've read all three parts of this series and you're ready to start, the best time to begin is right now.










All comments, feedback, information or materials except email addresses submitted to Lush Wush shall be considered non-confidential and its property. By submitting such comments, feedback, information or materials to us, you agree to a no-charge assignment of all worldwide rights. For the best interest of the community, please refrain from posting vulgar comments, profanity, or personal attacks. Comments submitted may automatically be flagged for review by our moderation team before appearing on the website.